A basement has the potential to be used in a variety of ways, such as a kids’ playroom, home office, extra bedroom, or den. However, before you move in the toys or pool table, you will need to frame the basement walls.
Framing the walls will allow you to apply different paints and materials—unless you like the industrial look of concrete. For experienced DIYers, framing a wall is a fairly straightforward job; however, it is vital that the job is done correctly to ensure the room stays dry and warm throughout the year. In this post, we will take a look at how to frame a basement wall.
Step 1: Planning
In any DIY job around the house, it is crucial that you prepare correctly before you even consider starting the job. This will mean taking detailed measurements of the area and finding the right materials for the job. Getting something wrong at this stage could have disastrous knock-on effects later on in the project.
You will also need to check on any required building permits and submit a planning application.
Step 2: Prepare
Once all that is out of the way, you can start preparing the basement for the remodeling. This stage is vital, as you will need to make sure that the existing walls are sealed to ensure moisture doesn’t get in and start rotting the wood frames. After sealing the walls, it is usually a good idea to install some foam boards so that the basement is properly insulated. The last thing you want is a cozy looking space that no one uses because it’s too cold.
Step 3: Wait a Minute
Before you start putting the frames together, there are a few more jobs that need to be done. At this stage, you may need to install blocking between joists to act as wall plates for the frame in places where the walls run parallel to the joists. (You will have already determined whether this step is necessary during the planning stage.)
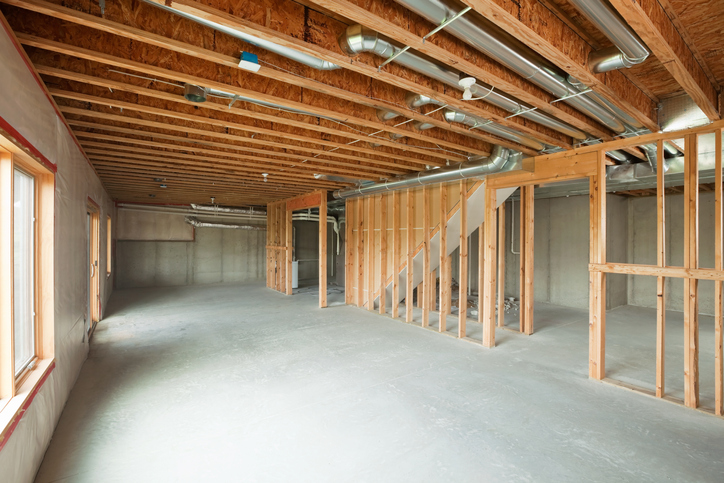
Step 4: Assemble the Frame
There is a lot to consider regarding whether you should assemble the wall on the floor or “in place,” but ultimately, the decision will come down to the available space. Whatever method you go for, you will need to ensure that you can easily measure out the studs. It is essential that you devote a lot of time and patience at this stage, so you don’t end up with a structure that looks like a rocking chair. Pay close attention to any imperfections or uneven surfaces, and adjust accordingly.
Once the studs are in place, you can secure the top and bottom plates. When you have the walls up, you will be ready to tackle the tricky parts of the basement, such as plumbing, ductworks, and windows.
Step 5: Finishing Touches
It may not be fun, but making sure that hard-to-reach spots are adequately insulated and framed will make the difference between success and failure. Any “obstacles” will require building in place instead of putting up the frame in advance. Windows will require extra frames around them, which will need to be sealed to keep out the cold and wet. Ducts and plumbing will also need to be “boxed over” or “placed” between the studs.
Step 6: Breathe (Or Avoid Steps 1–5 and Call in the Experts)
This post was designed to give a brief introduction to how to frame a basement wall. Having read it, you probably have a better idea now as to whether or not you are up to the job. Sometimes, it is more time-effective and cost-effective to call in the experts, who will have extensive experience in this kind of work. However, if you want to give it a go, you can be sure that you will enjoy a sense of satisfaction from a job well done.